How to Fit a Shotgun
I’ve been struggling with my shotgun shooting for the past few years. Not so much 3-gun or wing shooting, but oh … those orange clays. To help up my game I finally decided to get fit for a custom shotgun. I reached out to Dave Miller of Miller Shooting Sports, who also works as the shotgun production manager and pro-shooter for CZ-USA. With tools in hand, he met me at a shooting range in southern Ohio and we began the first step to getting fit for a custom shotgun – the measuring.
First, Dave asked me how I planned on using the shotgun. I informed him I wanted to increase my skills shooting sporting clays and in turn, use the same shotgun for wing shooting. Dave assured me once I had a shotgun that fit me correctly I would find shooting easier. Rather than struggling to mount the gun correctly and focus on the target it would just happen.
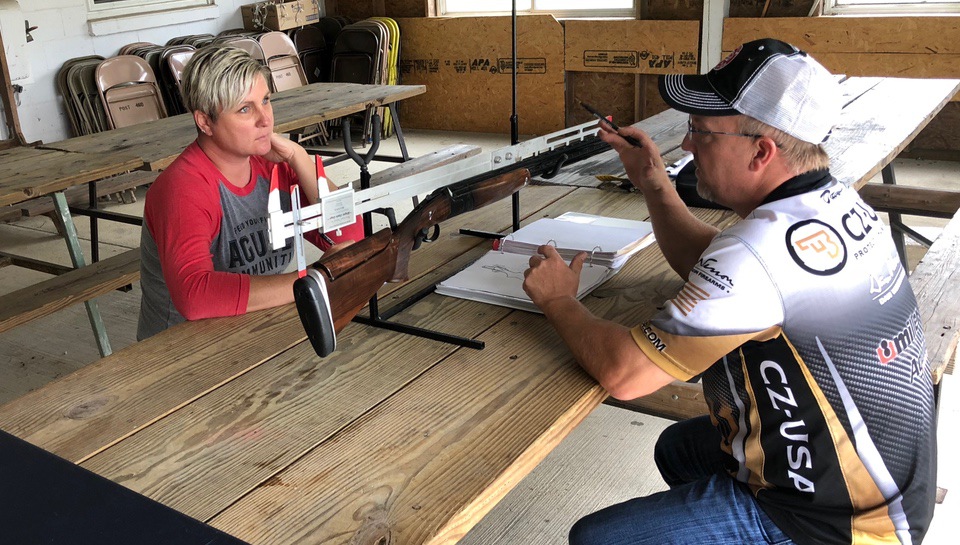
Dave brought an older CZ shotgun that allowed him to make adjustments on the stock until it fit me correctly. Also, he had a shotgun combo gauge that allowed him to take all the measurements he needed. Using an unloaded shotgun (that we confirmed every time I picked it up), I mounted the gun numerous times.

Measurements to Fit a Shotgun
Drop at Comb
The most critical measurement when getting fit for a shotgun is the drop at the comb (B). It allows your cheek to rest at the correct height, which in turn allows your eye to fall naturally in line with the gun’s rib. With the proper drop, you can quickly mount a shotgun without any need for adjustment before firing.

Drop at Monte Carlo
Monte Carlo stocks allow for more comfortable fit and considerably less felt recoil. This style of stocks is common on target guns because of such high volume shooting. Note the drop (Photo E), which is the farthest comb measurement before the heel.

Drop at Heel
The drop at heel (C), is the distance from the rib line to the heel of the gun. Unlike the drop at comb, where a small change makes a big difference, a fairly wide range of drop at heel measurements can comfortably accommodate an average shooter. However, the amount of felt recoil is affected by different measurements. For instance, a gun with a straight stock (little drop at heel) has less perceived recoil since the force is directed straight back into the shoulder. On the other hand, a stock with a large drop at heel will exhibit more felt recoil because the gun rotates up into a shooter’s cheek. However, this gun typically feels more comfortable during the mount and swing. It’s all a matter a preference.
Drop at Toe
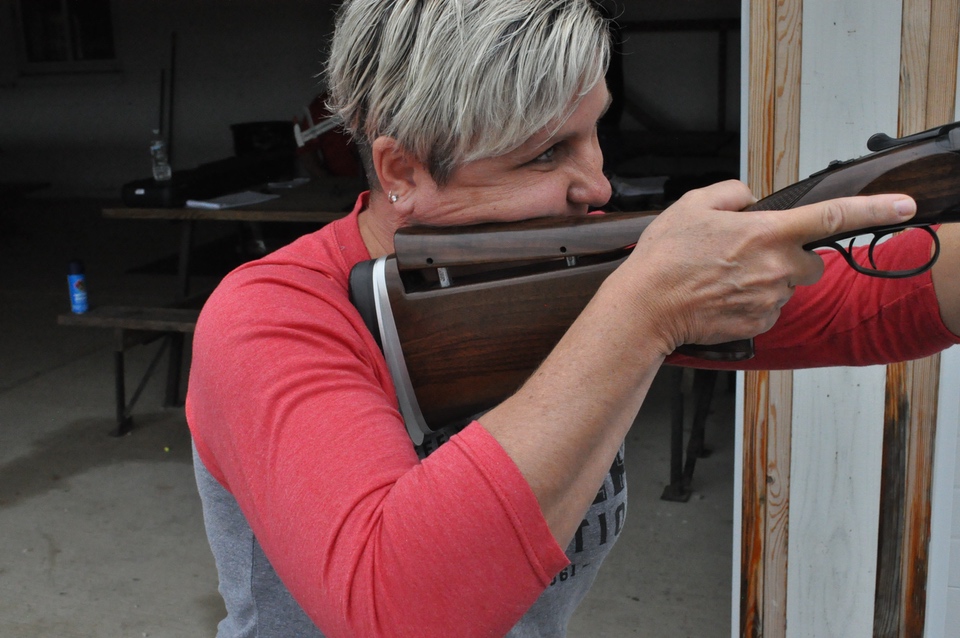
The distance from the rib line down to the bottom tip of the butt is the drop at toe (D.) This is the lowest portion of the butt stock and also, the lowest part that contacts the shoulder. The greater the difference between the drop at heel and the drop at toe, the longer the butt pad. The larger the pad, the more the recoil is distributed on a shooter’s shoulder. Likewise, the smaller pad, (less difference between drop at heel and drop at toe), results in all the force going through a smaller surface, thus, more felt recoil.
Pitch
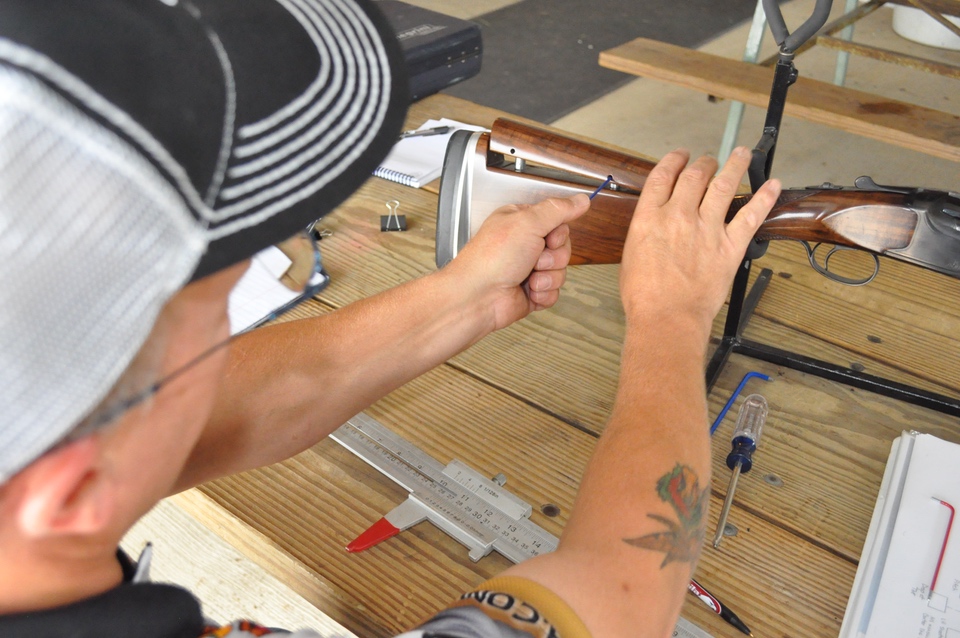
Pitch (F) is the angle of the butt pad’s back surface, measured off of a perpendicular line drawn down from the rib. This measurement is especially important for women with larger chests. If the stock has too little pitch, it will distribute recoil with only the toe section of the butt, often bruising a shooter’s shoulder. With more pitch, a stock distributes recoil through the entirety of its corresponding butt pad, making the gun more comfortable to shoot.
Length of Pull
The measurement from the center of the butt to the center of the trigger is length of pull (A). Length of pull is dependent on many factors: length of arms, length of neck, shoulder width and stance. Because of their anatomy differences, similarly-sized people can have completely different lengths of pulls, based on their stances alone.
A length of pull measurement that’s too long forces a shooter away from the gun, moving her cheek back from the point of the comb where it belongs. Also, the butt may catch on clothing when quickly mounting the gun. On the other hand, too short a distance is uncomfortable to line up. Then, a shooter is forced ease her face back, away from the breech.
Cast
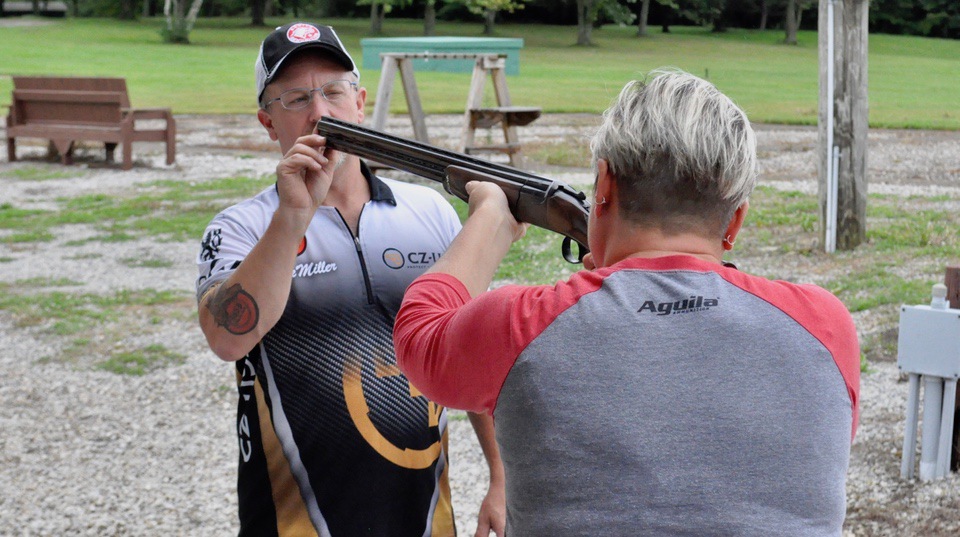
Cast refers to the deviation of the butt away from the center line of the gun. It allows a shooter to look straight down the rib. A cast-off stock is meant for a right-handed shooter and a cast-on stock for a leftie. When viewed from above, a shotgun with no cast is straight. A line down the rib will continue straight down the center of the butt stock. When looking from the back of the gun, a cast-off stock will show the center of the butt slightly right of the center of the rib line and just the opposite for a cast-on stock.
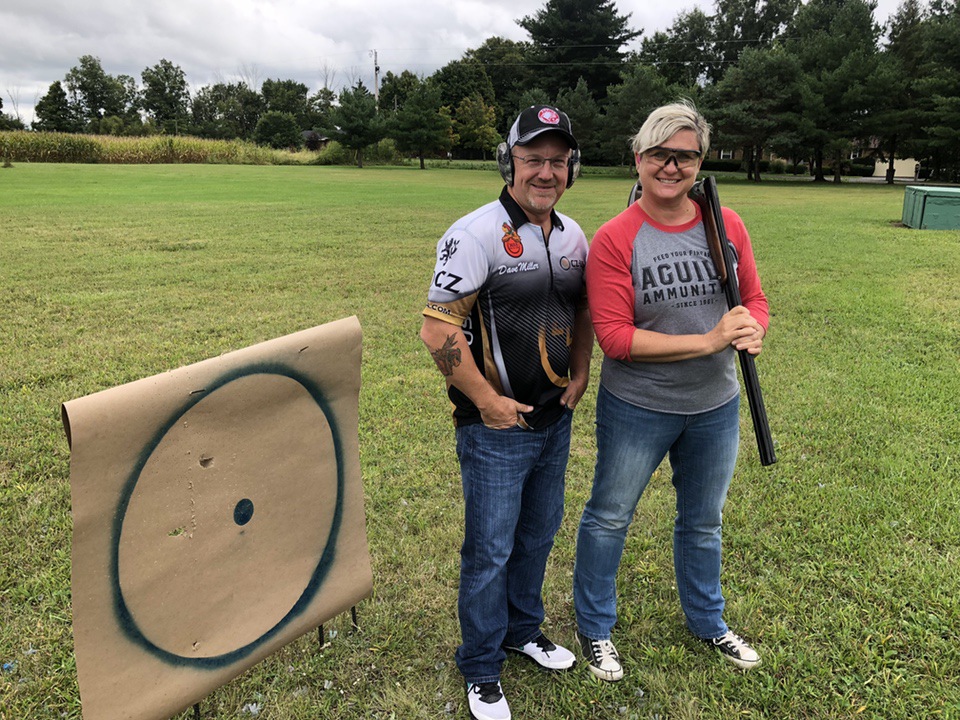
After the measurements had been taken, I took a few shots at the pattern board. The pattern fell exactly where Dave expected it would fall. To finish the order, I had a few things to decide on, such as the type of wood for the stock, what color barrel and then some engraving I’m having added. Now, all I have to do is wait.
Find out more about CZ-USA here and Miller Shooting Sports here.
This article was originally posted at Women’s Outdoor News.
Carrying Concealed During Yoga Class
A year ago in October I signed up for a month’s worth of unlimited yoga classes. I arrived at my first class with my hair in somewhat of a ponytail (it was still just a little too short to all stay in), new yoga outfit (yes, I didn’t own a pair yoga pants), mat, towel and my GTM purse. As customary in many yoga studios, shoes and coats are left at the door. Some ladies left purses in cubbies, but my GTM concealed carry purse accompanied me to the mat.
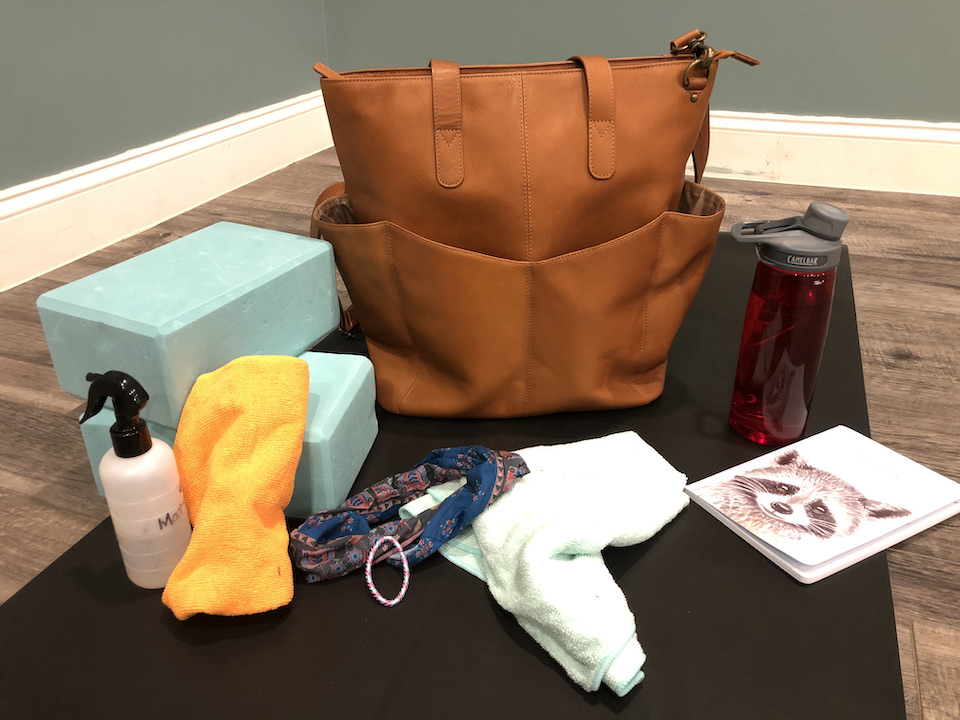
To avoid having to lug too many bags into class, I decided to convert my GTM-107 Travel Tote into a yoga bag. It fits everything I need, except my mat. Here’s what I pack in it:
- 2 blocks
- Towel
- Mat spray and rag
- Water bottle
- Journal and pen
- Hair ties and headband
- Firearm
Now don’t get me wrong, yoga class is a place of peace and serenity. A place I feel safe and relaxed. Heck, I’ve almost fallen asleep at the end of class during Savasana, the final resting post or corpse pose. But that doesn’t mean I’m not aware of my surroundings.
You may recall back on November 2, 2018, at a yoga studio in Tallahassee, Florida, 2 people were killed and 5 others wounded. The killer fired his gun 13 times. What if someone could have fired back? Better yet, what if someone could have stopped him before he even started?
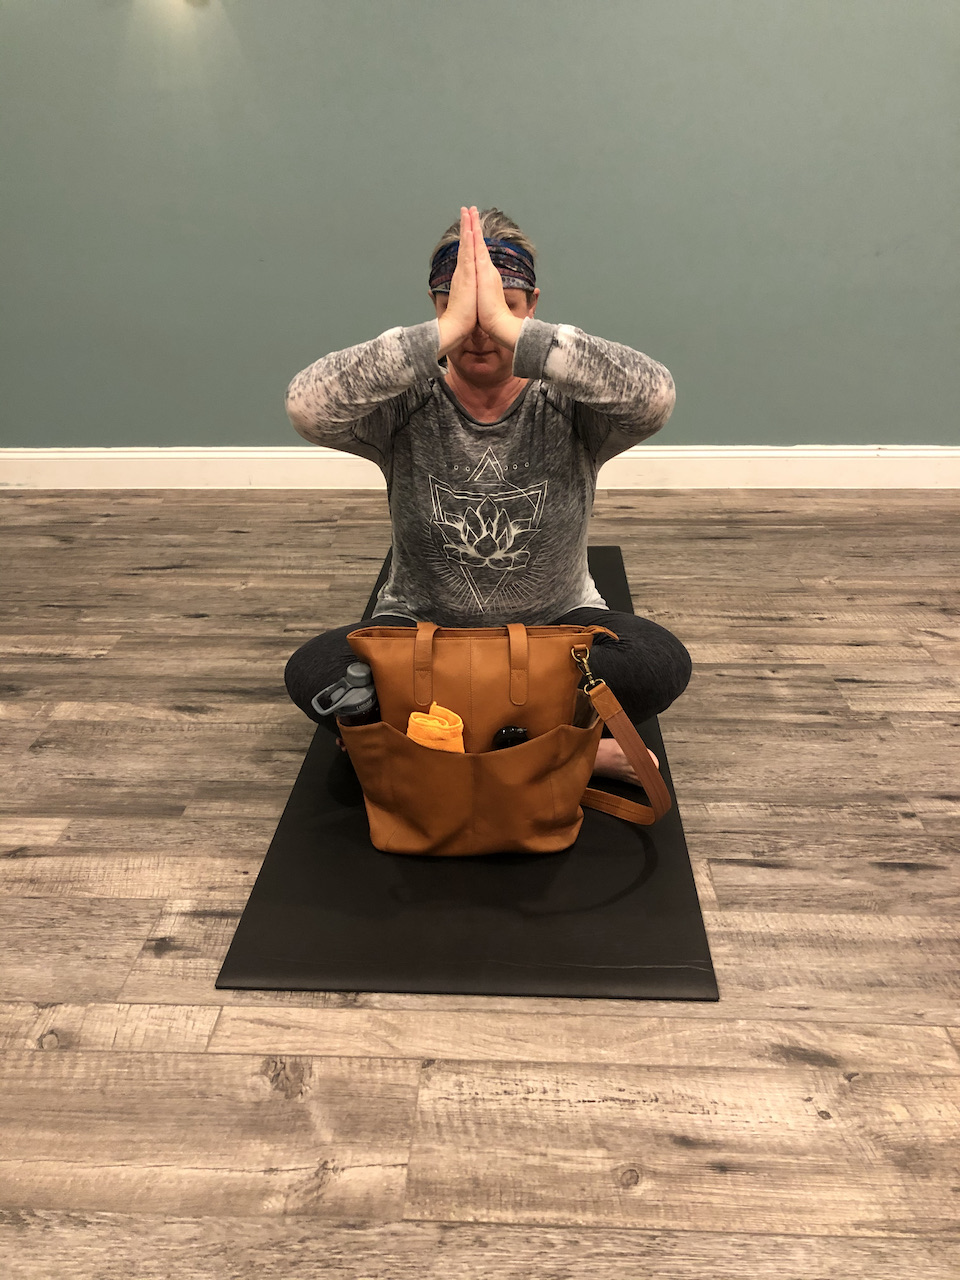
Situational awareness and taking safety precautions during yoga class are a must. Following is a list of suggestions to reduce your chance of becoming a victim
Yoga Class Safety
1. Pay attention when new students arrive. Do they look ready to attend a class? Are they wearing suitable clothing? Trust your gut if something doesn’t seem right.
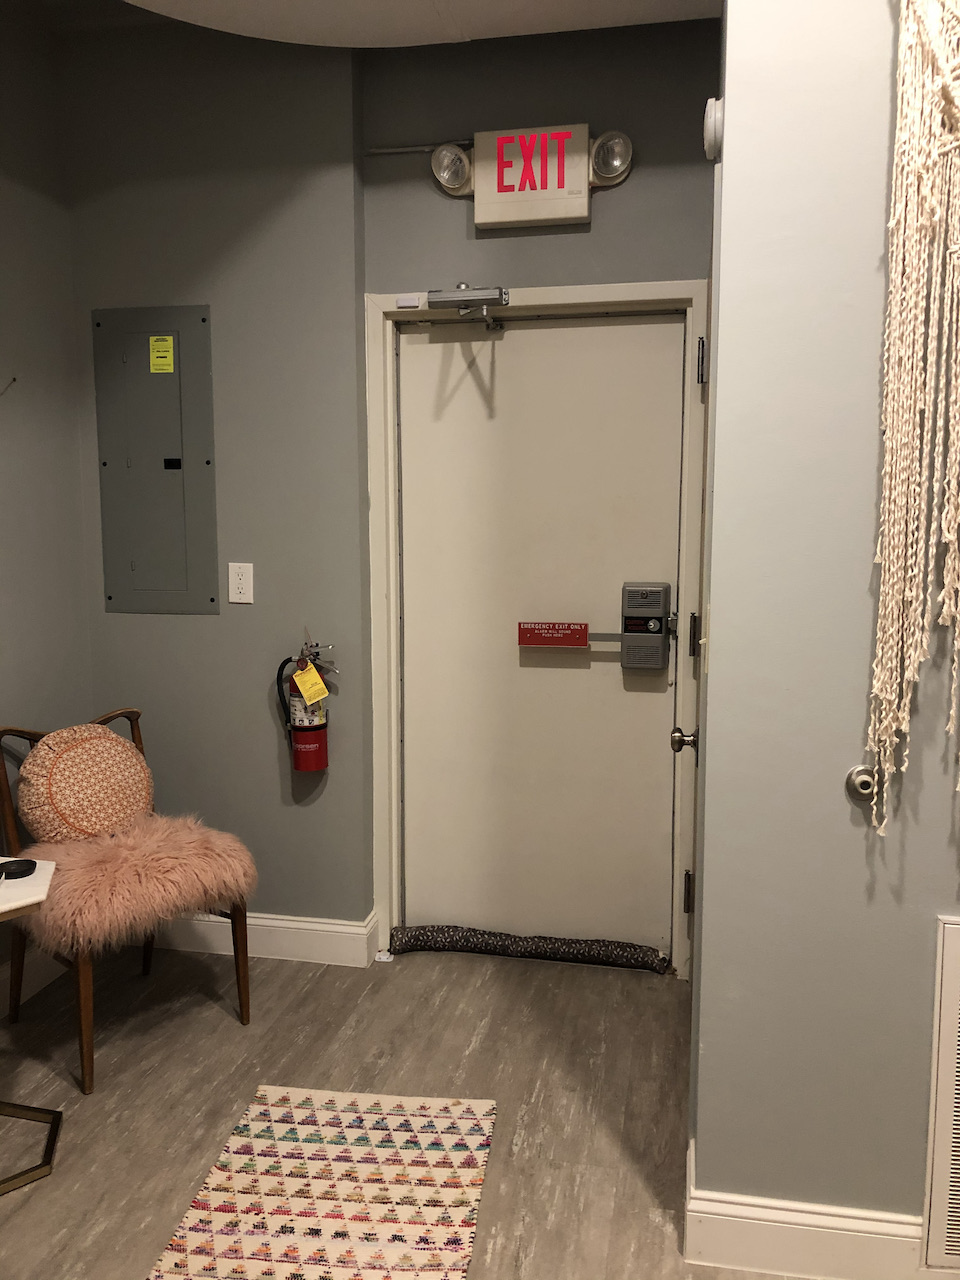
2. Find all the exits at the studio. There is usually a back door that you haven’t seen; figure out the fastest way to get there and how to unlock it.
3. Ask the instructor to lock the outside doors during class if nobody is watching the main entrance. If that’s not possible lock the door(s) of the room.
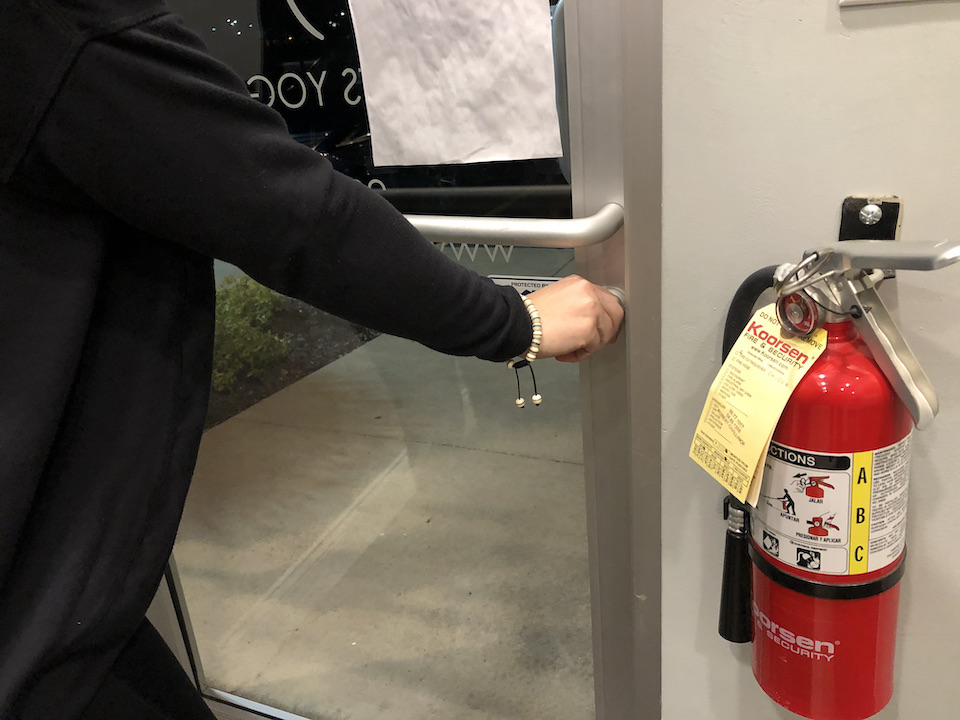
4. Check for hard cover, such as a a closet, desk or something else you can get into or behind.
5. Have a plan. When someone comes into the room and tries to harm you, how will you react? Remember, the body won’t go where the mind hasn’t been.
As always, (using an unloaded gun with no ammunition in the room) practice removing your firearm from your concealed carry purse in different yoga poses. Also consider how and where you will position your purse so you have the easiest and fastest access.
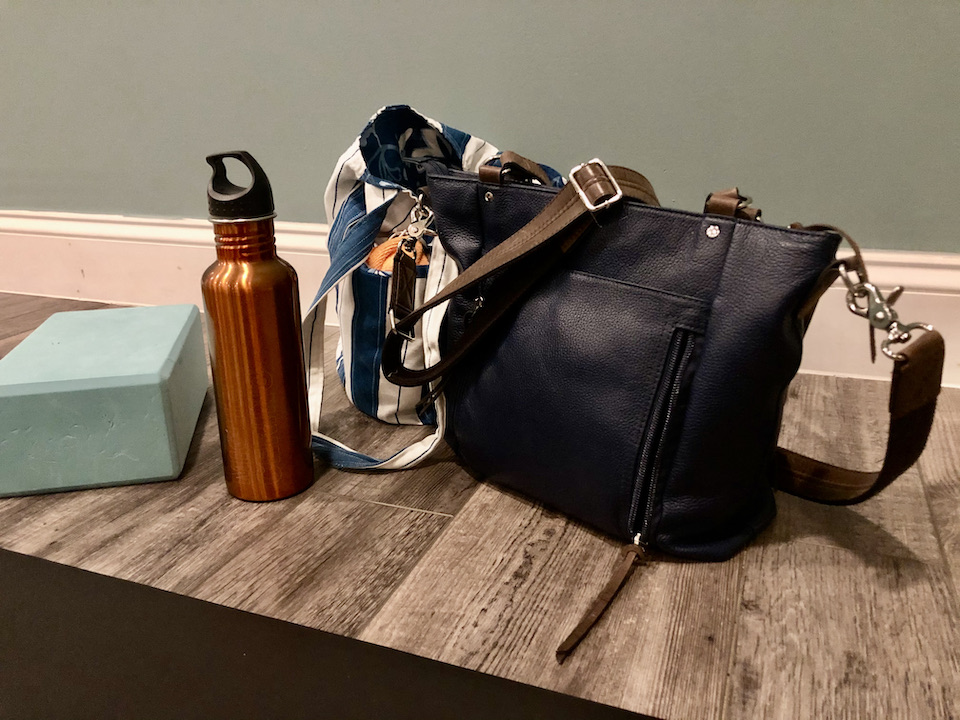
In case you’re wondering, I’m still attending yoga classes regularly. My hair now stays in a ponytail and my GTM purse always joins me.
Read more uses for the GTM-107 here.
Namaste!
This article originally appeared in Women’s Outdoor News here.
Off Body Purse Carry … It’s OK
Sometimes while teaching a firearm training class, I’m asked by a male how he can get his significant other to carry concealed on her body instead of in her purse. Likewise, women come to me frustrated, almost asking permission to purse carry because so many people tell them it’s not safe. Honestly, I don’t see the big deal. If using a purse is the only way a woman wants to carry her gun, let her carry in her purse. It’s better than not carrying at all.
With a little online research I found a few reasons people say women should not carry off body. Following are the quotes along with my responses:
“The first thing a thief is going to grab is a woman’s purse.”
I asked a local police officer in my hometown how many purse thieves have been reported. He said in all his years, never. However, I realize in a given situation, someone may want to just steal a purse. So, let him and report it along with your handgun stolen. Think about it, are you carrying a gun to defend yourself from a thief? Probably not. I know I carry a concealed handgun to defend myself, family and others against a person who intends to do me or them harm.
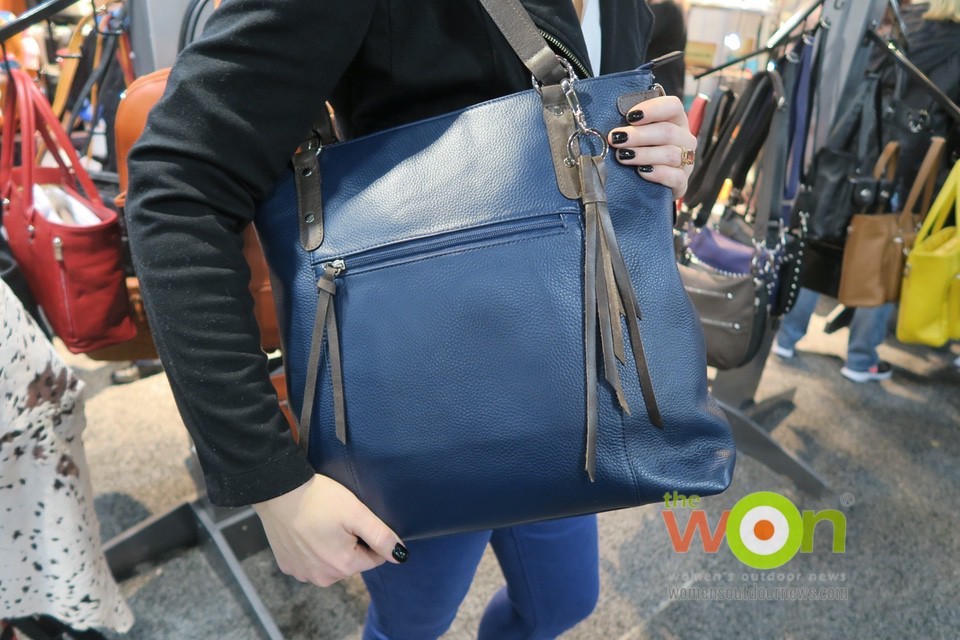
Although I haven’t timed it, common sense tells me drawing from a purse and coming to a full presentation takes longer than drawing from a holster. How much longer depends on some factors: the location of the gun compartment and type of closure, the size of the compartment, and if the gun is in a holster within the compartment. Now, compare drawing from a purse to drawing from under a full length coat during the winter. Which one do you think takes more time? With my long coat buttoned all the way, I have to get under that and under my shirt layers to get to my handgun. Carrying in my purse now becomes a faster option.
Now, just because your gun is in your purse doesn’t mean you have to draw to a full presentation before firing. Yes, you can shoot from within your purse. This may become necessary when your target is in close proximity and you have no time for sighted fire, when time is of the essence.
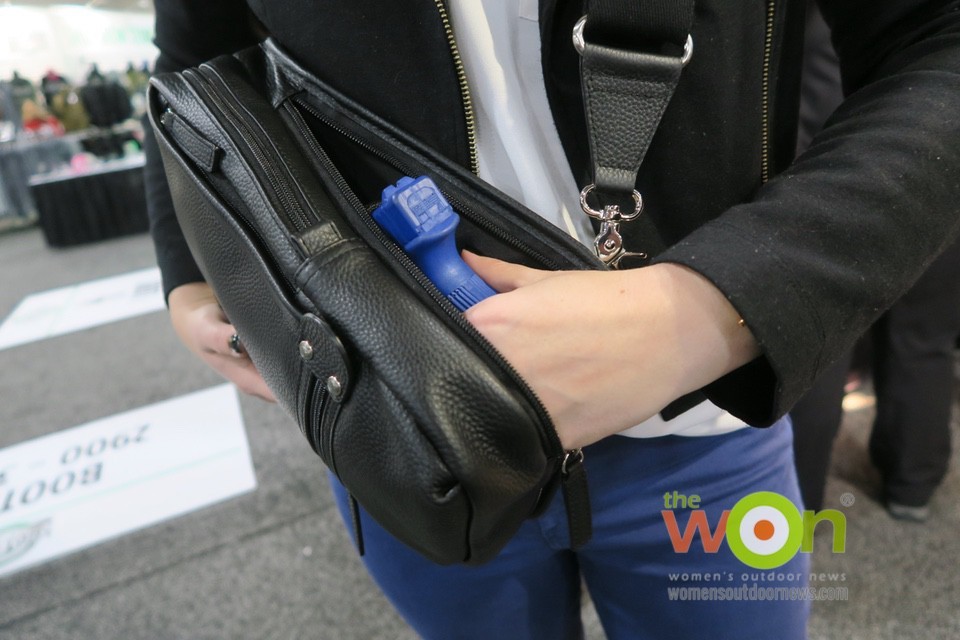
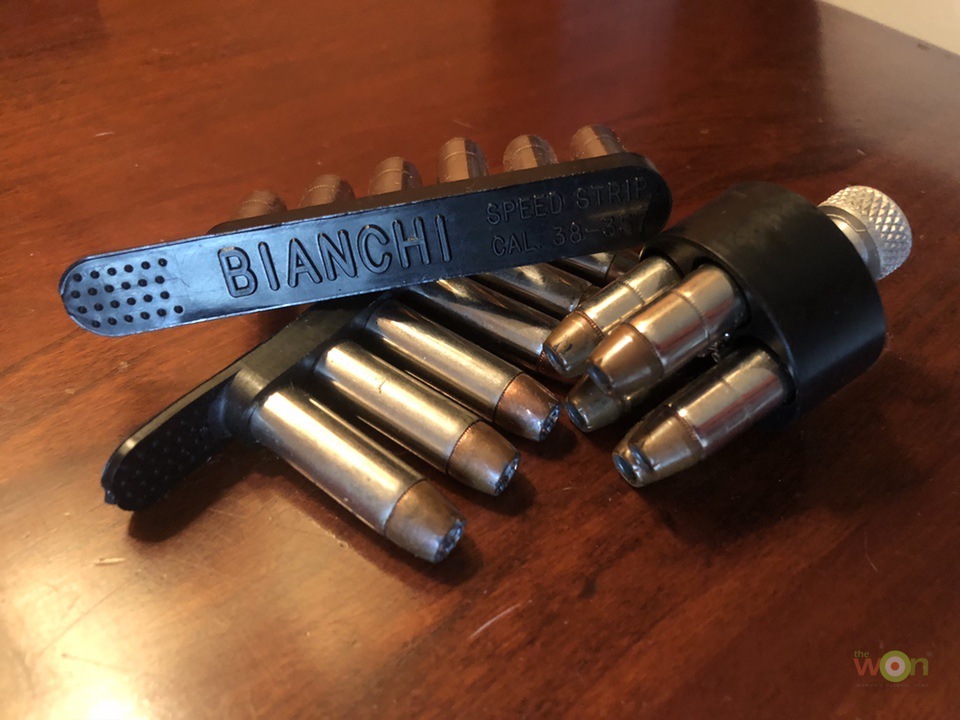
If you decide to attempt this tactic, you have to carry the correct type of gun. Yes, a semi-automatic gun has a very good chance of jamming. A lack of space and variety of hang ups will keep the slide from operating properly. Most likely a first shot goes off, followed by a malfunction. Unfortunately the best choice requires giving up capacity by choosing a lightweight hammerless revolver. Unlike semi-automatic handguns, hammerless snub-nosed revolvers cycle reliably from a purse or even in your pocket. So, you have to decide if having 5 or 6 rounds ready at hand is better than having a high capacity magazine that may not meet your needs. Remember, you can always carry extra rounds for your revolver in a Bianchi Speed Strip or HKS Speed Loader.
Purse Carry Tips
If you decide to carry in a purse, never allow you gun to mix with the items inside. Keys, pens and other small objects can get in a trigger guard and cause an unintentional discharge or render the gun inoperable. It’s best to use a purse specifically created for concealed carry. This keeps the gun in a separate compartment and sometimes even offers multiple access points to retrieve your gun.
Yes, shooting through your purse works extremely well. However, sighted aimed fire from full presentation is always the best and safest choice. If carrying in a purse means you will carry your gun, I highly recommend it. Make sure you have the proper gun to meet your needs and become comfortable with it. Practice is essential.
This article, Off Body Purse Carry … It’s OK, first appeared at Women’s Outdoor News on April 18, 2018.
Eleanor Roosevelt Was a ‘Pistol Packin’ Mama’
March is Women’s History month and this year I’m bringing an unlikely person to the forefront, Eleanor Roosevelt, wife of President Franklin Delano Roosevelt. Although I’m not sure where I originally found this information, I’m super excited to finally have the opportunity to share her story. Roosevelt kept a secret regarding firearms that might surprise you.
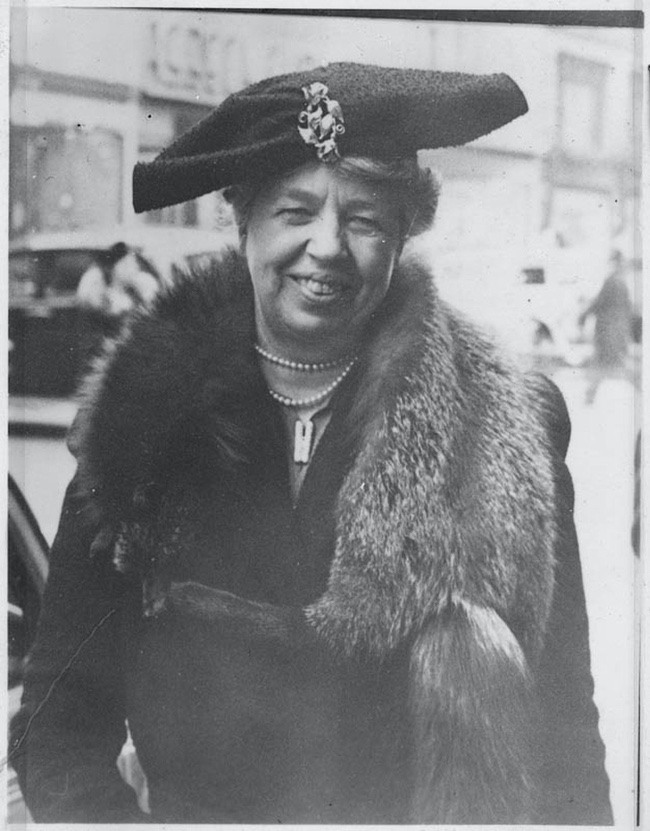
Born October 11, 1884, in New York City, Eleanor Roosevelt, the niece of President Theodore Roosevelt, married Franklin D. Roosevelt on March 17, 1905. A politically active First Lady of New York State, from 1929 to 1933, Eleanor broadcast “Women in Politics” on NBC radio, edited the Women’s Democratic News and did major fundraising for the National Democratic Committee’s Women’s Activities Committee.
On March 4, 1933, Eleanor Roosevelt became the First Lady of the United States and occupied this position until her husband’s death on April 12, 1945. Throughout this time, she penned columns in Women’s Home Companion magazine, Ladies Home Journal and McCall’s, as well as a syndicated newspaper column. She also gave almost 1,400 speeches, had her own radio shows and published numerous books. Wow … how did she get it all done?
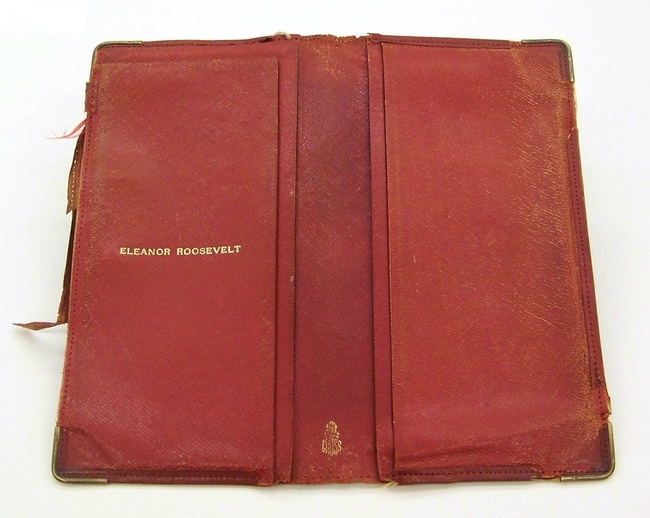
I could go on and on about all of Eleanor Roosevelt’s accomplishments and various endeavors. But what really intrigued me about this amazing women is the contents of her wallet at the time of her death.
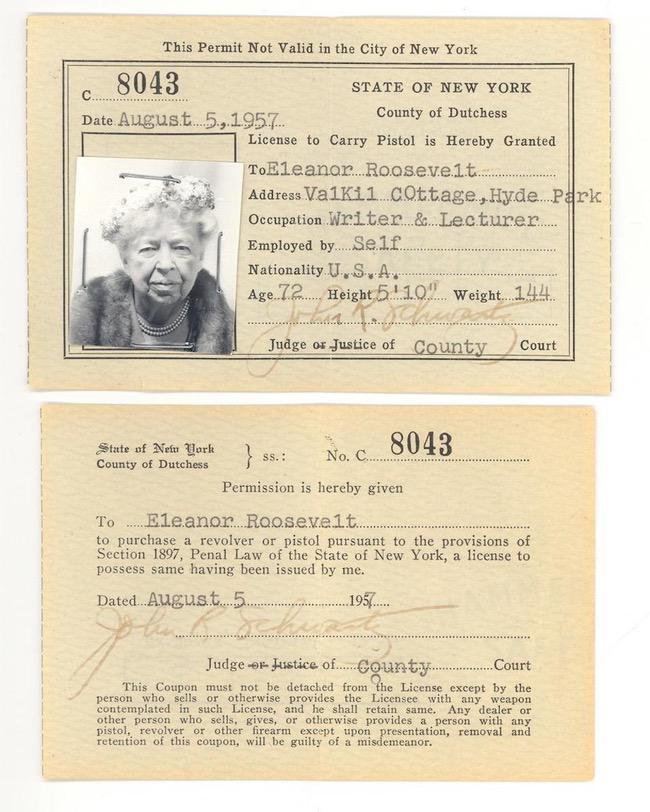
Sure, you might expect to see some of these items in her wallet that I found on the National Archives website: a press club membership card, a membership card for the National Federation of Press Women, a Metropolitan Museum of Art membership card, credit cards, a Blue Cross insurance card, an eye bank donor card, hotel and airline courtesy cards and bits of paper containing words of inspiration or favorite poems. However, did you ever think it would contain a permit to carry a pistol, issued by Dutchess County, New York? Yep, Eleanor Roosevelt was a “Pistol Packing Mama!”
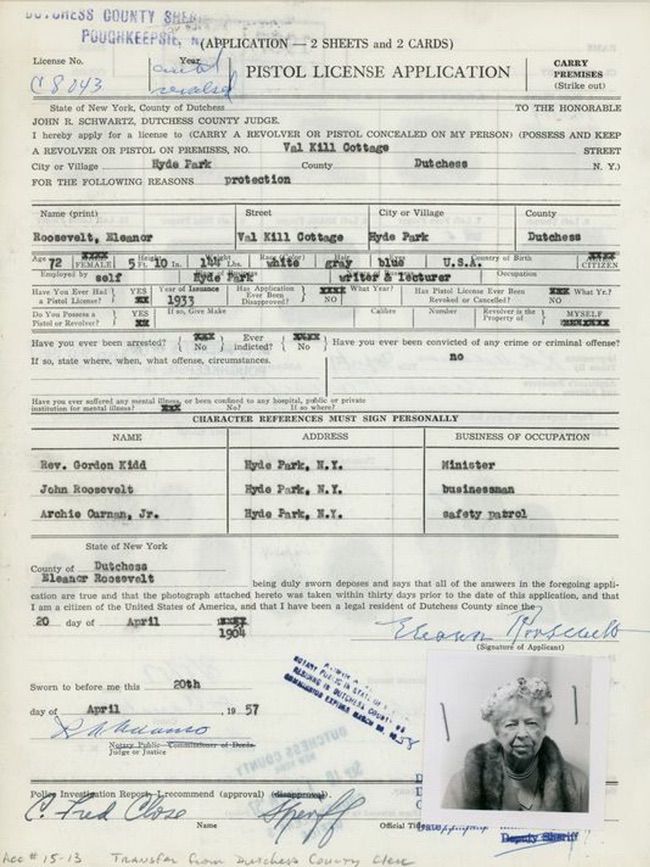
At 72 years, Eleanor received her License to Carry Pistol permit on August 5, 1957. However, through my research, I found out that she carried a pistol well before that, maybe not concealed, during her time as First Lady.
According to Eleanor’s autobiography, “After the head of the Secret Service found I was not going to allow an agent to accompany me everywhere, he went one day to Louis Howe [FDR’s secretary], plunked a revolver down on the table and said ‘Well, all right, if Mrs. Roosevelt is going to drive around the country alone, at least ask her to carry this in the car.’”
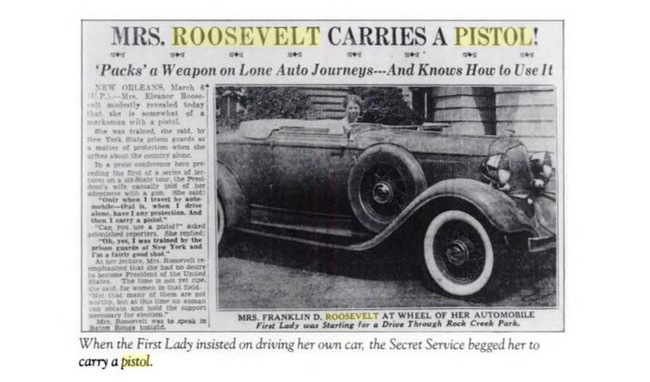
In one of her newspaper columns, she is quoted as saying, “I do not mean by this that I am an expert shot. I only wish I were. … My opportunities for shooting have been far and few between, but if the necessity arose, I do know how to use a pistol.” And as for training, upon her request, one of her husband’s former bodyguards taught her how to use the revolver she kept in the glove compartment of her automobile.
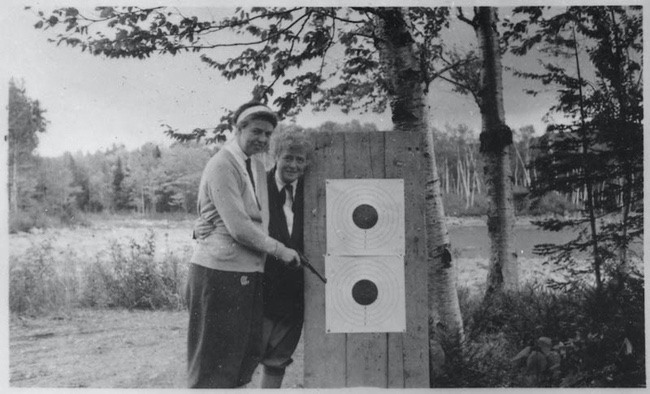
Whether Eleanor continued to carry her revolver after her time as First Lady or how often is unknown. However, according to her biographer Allida Black, “When Roosevelt defied death threats by the Ku Klux Klan to travel to Tennessee in 1958 to attend a civil rights workshop, she and the woman who picked her up at the Nashville airport drove to the conference with ‘a loaded pistol on the front seat between them.’”
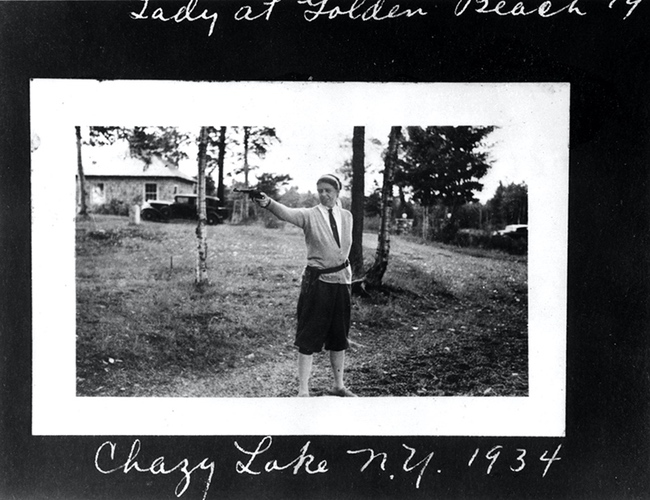
Eleanor Roosevelt died at age 78 on November 7, 1962, in New York City. Her funeral was attended by President Kennedy and former presidents Harry Truman and Dwight Eisenhower. She was buried next to her husband on the grounds of the Roosevelt estate in Hyde Park.
Eleanor Roosevelt her own first responder.
Like many women I know, Eleanor Roosevelt took safety into her own hands. She learned how to handle her gun and took lessons from a qualified instructor. Traveling without Secret Service meant the police were minutes away when the threat was seconds away. She was her own first responder.
“You gain strength, courage and confidence by every experience in which you really stop to look fear in the face. You are able to say to yourself, ‘I have lived through this horror. I can take the next thing that comes along.’ You must do the thing you think you cannot do.”
~ Eleanor Roosevelt, “You Learn by Living: Eleven Keys to a More Fulfilling Life”
Personal Safety: How Not to Be a Victim
There are numerous suggestions to help reduce your chances of becoming a victim. Over the years I’ve attended several courses and read many books and articles about personal safety. Following are 7 key aspects to increase your safety, no matter where you are.
1. Awareness
Every personal safety list seems to begin here, so mine will too. An aware person knows something exists. Whether it’s a situation, condition or problem; someone who is aware understands what’s going on in the environment around them. When you are aware you feel, experience or notice sounds, sensations, or emotions. As an aware person, you will be alert to who or what is around you. This will shorten your reaction time should something happen. Don’t be surprised…instead, be aware.
2. Attitude
Looking like you know exactly where you are going, and what you are doing can keep you from being a target. Walk with an authoritative posture, keep your head high. Acknowledge strangers as you walk past them. Look them in the eyes and give a nod of the head or a smile. If a possible attacker knows you can identify him, perhaps he will pass you by. If someone asks for the time or directions, be courteous, but keep your distance and keep moving.

3. Visualization
The body won’t go where the mind hasn’t been. What will you do WHEN you are attacked. It’s not “when, then” thinking but “if, then” thinking. Visualize the attack and play it out in your mind with an ending where you win. Having a plan will help you avoid freezing when something happens. Expect the unexpected and you won’t get caught off guard.
4. Boundaries
Draw a line in the sand. Distance is your friend so have a predetermined distance you will allow someone to come toward you. This may be different depending on your location, if you are alone and the time of day. If someone reaches that distance, and you do not feel comfortable, cross the street or change directions. Use your voice and tell them to “STAY BACK”. Always maintain a safe distance.
5. Instinct
Gut instinct, women’s intuition, or sixth sense, many of us have had that, “feeling” we call instinct. When the hair on the back of your neck stands up, it is your mind picking up on something unnatural. Unfortunately, with society demanding “politically correctness,” some women won’t act on their instinct to avoid a situation. When you feel something just isn’t right make a change. If an elevator door opens, and your gut tells you not to get in, don’t. If you’re already on an elevator, and someone gets on, press the button for the next floor and get off. Worrying about overreacting may cause you to hesitate or maybe even ignore your intuition. It’s better to be safe then sorry.

6. Escape
Be aware of the way out. If you are in a store, doctor’s office, any public building, make note of emergency exits when you enter. When outdoors, if your instinct tells you something is wrong, run straight to a group of people, or into a building where you can see people. Yell along the way to draw other’s attention.
7. Determination
Should you become a target, NEVER give up. Even if you’re injured, keep fighting. When law enforcement does training scenarios, the good guy never dies. This helps build the mindset to continuing fighting, no matter what it takes. You will win and get home to your family.
Personal Safety Training for the Mind
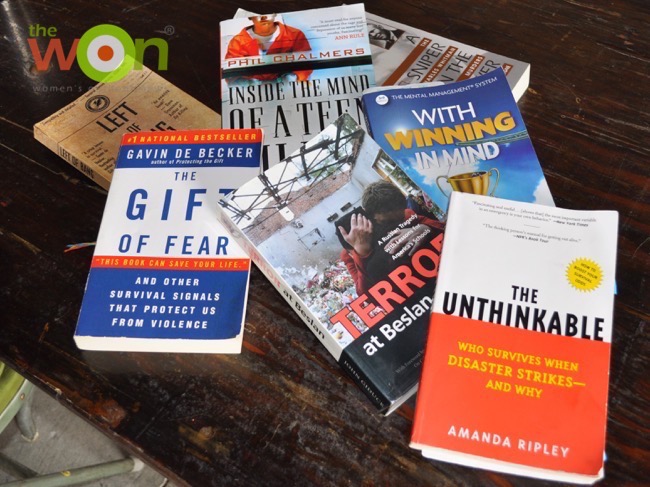
I believe having the proper mindset is what will help me win the day. As mentioned above, I have read many books to help me get to where I am today.
On Killing ~ Lt. Col. Dave Grossman
On Combat ~ Lt. Col. Dave Grossman
Warrior Mindset ~ Lt. Col. Dave Grossman
The Gift of Fear ~ Gavin De Becker
Left of Bang ~ Patrick Van Horne & Jason A. Riley
The Unthinkable: Who Survives When Disaster Strikes – and Why ~ Amanda Ripley
There is always the possibility you could become a victim. If you expect it to happen you will be better prepared to avoid it and respond without hesitation. Do your research, have the right state of mind, and stay safe.
Grandma Carrie’s Turkey Stuffing Recipe
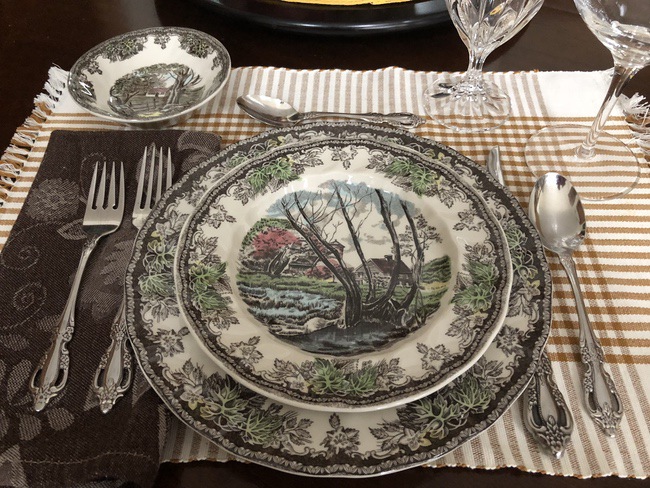
It’s been passed down to 3 generations and I’ve been given permission to share. Here it is, Grandma Carrie’s Turkey Stuffing Recipe.
Ingredients:
1 stick butter
2 larger cloves of garlic
4 cups celery diced
4 cups onion diced
3 tbs. parsley minced
3 tbs. chicken base
2 cups mushrooms sliced
1 1/2 loaves dry Italian bread (crust on, ripped in chunks, soaked in water and squeezed dry … but not too dry.)
6 eggs beaten
1 lb. ground Italian sausage (cooked)
White pepper to taste
1 tsp. dry sage
Directions:
Sauté butter, garlic, celery and onion until tender crisp. Add mushrooms and sauté for 3 minutes. Add cooked sausage and chicken base, cook lightly.
Mix soaked bread, eggs and parsley together in large bowl. Fold sausage mixture and bread mixture together. Pour into buttered oven safe dish. Bake at 350° until mixture reaches 180° Should be a loose texture.
Michelle’s notes:
I like to add a little more garlic and mushrooms. Also, I use 2 whole loves of Italian bread that I purchase 2 days before Thanksgiving and leave the bags open. For my cooking I use a hotel pan.
Remember, a recipe is just a guide. Use you imagination and tastebuds to make Grandma Carrie Turkey Stuffing Recipe your own.
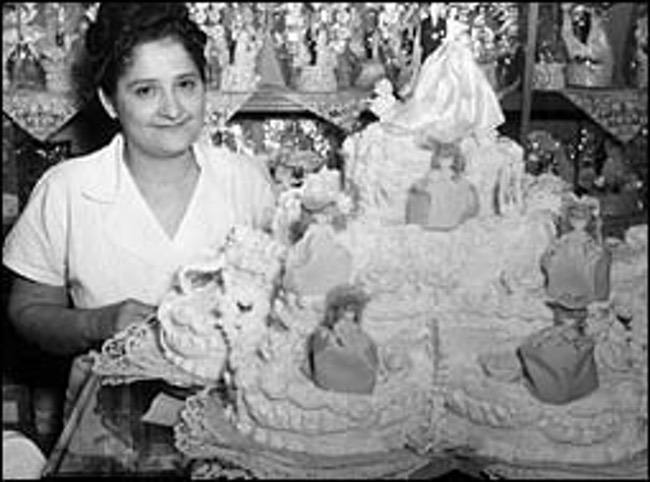
A little history of Carrie Cerino:
In 1897 Alesandro Cerino arrived at Ellis Island with his 3 brothers. He later settled in the Cleveland area and brought his young bride and eldest son, Dominic, from Italy. Carrie’s father, Carlo Coraretti, brought his wife and children from Italy in 1916. The voyage for then 6 year-old Carrie brought forth her independent spirit. She would consistently sneak out from the hold to spend time with the sailors, learning their raucous songs and chanteys.
Dominic met Carrie Coraretti in 1929, and they were married in 1931. In the good old days Carrie Cerino’s veal parmigiana disappeared moments after it was served. But in those days, the young bride’s culinary creations were tossed out the second-floor window more often than into the stomach of her husband, Dominic. It was a cruel fate, particularly because the less than tasty meal plummeted by the window of an observant mother-in-law. Those quick lessons in pride taught the young Carrie Cerino how to cook and born where the Cerino culinary standards.
FASTER Saves Lives and Protects Your Children
Not a month goes by without a news report of an active killer situation somewhere in the United States. If you look at the FBI statistics (which have only been updated to 2013), they are constantly on the rise. If only the police could get there faster, to protect our children at school.
I spent many years substitute teaching while my boys were in grade school. Eventually I earned my teaching license and taught for 2 years in long-term sub positions. Why do I mention this? My background is somewhat diverse, allowing me to bring a well-rounded view to the important topic of having armed faculty in the schools. Oh, you weren’t aware there are school districts in the U.S. where some of the faculty is armed?

There are many, including those in my home state of Ohio. You see, some school districts out in the country may have up to a 40-minute wait for law enforcement to arrive after a distress call. They know their only hope to stop a killing is to take matters into their own hands. Other districts with faster police arrival times know that when seconds count, law enforcement is only minutes away. Many school districts in Ohio send their staff to FASTER Saves Lives, Faculty/Administrator Safety Training and Emergency Response (FASTER) Training, a course I’m proud to be a part of.
The FASTER Saves Lives program began as a vision of John Benner, owner of Tactical Defense Institute in Ohio. Although he had been working on the concept for a while, it wasn’t until the Sandy Hook Elementary tragedy in Newtown, Conn., that schools were ready to listen. Through the support of The Buckeye Firearms Association, this nonprofit program arose, giving educators practical violence response training.
Classes are provided at no cost to the school districts.

In March of 2013, I was part of the two dozen school staff members (out of 1,400 applicants) attending the first FASTER Saves Lives course. The 27 hours of training over 3 days was very intense. Since then, more classes are held every year; Level 2 and 3 courses have been added. So far, more than 500 staff members have been trained, hailing from 152 school districts in 63 of Ohio’s 88 counties.
This summer, my firearms consulting business, Cerino Consulting and Training Group, held 2 FASTER Saves Lives courses. A few of the students sent me e-mails after the course, giving some insight into their experiences.
Student 1:
I am not an educator, but I am a concealed-carry permit holder and a proud supporter of the 2nd Amendment. I am a business professional and the same threat of an active shooter exists in the workplace as in schools.
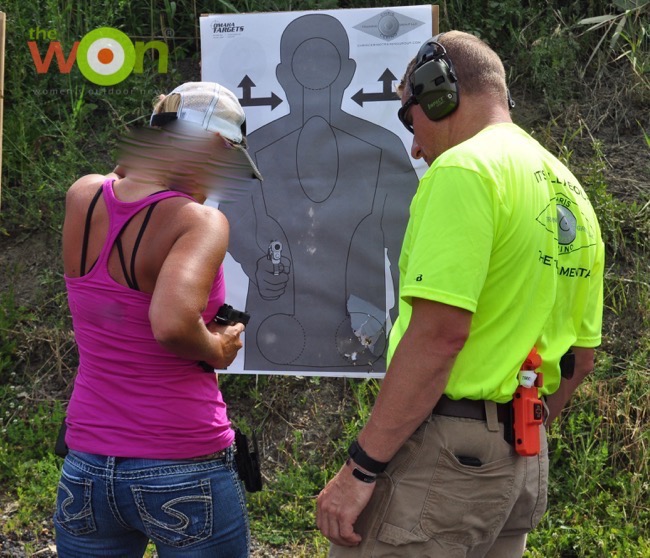
We spent 2 days outside on the range. It was hot. It was dirty. And it was intense. This was tactical training focusing on accuracy, speed and technique. We learned to shoot from a holster, on the move and under pressure. In order to achieve certification, we needed to pass a shooting qualification test—a test demanding better performance than what is expected from local law enforcement. This was serious stuff.
But the most stressful part of the program was the active shooter simulation. The simulation occurred at the end of the course in a nearby high school, and was designed to look and feel like a real active shooter scenario. Volunteer kids and adults were on site to serve as actors. The facilitators used guns firing blank ammunition, and we used airsoft guns for the simulation.
Anxiety levels were high. The simulation began: Gunshots were firing, kids were screaming, men were yelling…and it suddenly felt very real. As each of us waited for his or her turn in the the simulation, the stress grew. One woman thought she might be sick. My heart was beating fast. I felt the same fear and anxiety as my fellow students.
I was the last to go during one of the simulations. Shots were firing over and over upstairs. Wearing the protective mask, I could hear my own breathing loud in my ears as I made my way up the stairs. I came around the corner, and serpentined down the hallway, clearing doorways along my way like we had been trained. As I came around another corner, I saw our volunteer “shooter”—a teenage boy wearing a hoodie. He was backing out of a classroom after having just shot several victims … and he was laughing. I can still hear that laugh in my mind. Without hesitation, I raised my gun, put my sights on the shooter, and fired twice. They were good hits and he went down. The threat was over.
That night I shared the story with my husband. He asked if it bothered me. I was confused and asked him what he meant. He asked, “Did it bother you to shoot a kid?” I thought about it, and realized that until he asked me that question, I had never thought of the shooter as a kid. He was a bad guy with a gun out to hurt people—out to hurt children. I was trained to stop him, and that’s exactly what I did.
I am proud of the teachers in our class. Not only do these teachers dedicate their lives to educating our children, but now these men and women are willing to put their lives on the line—literally—in order to save our children. What a gift.
Student 2:
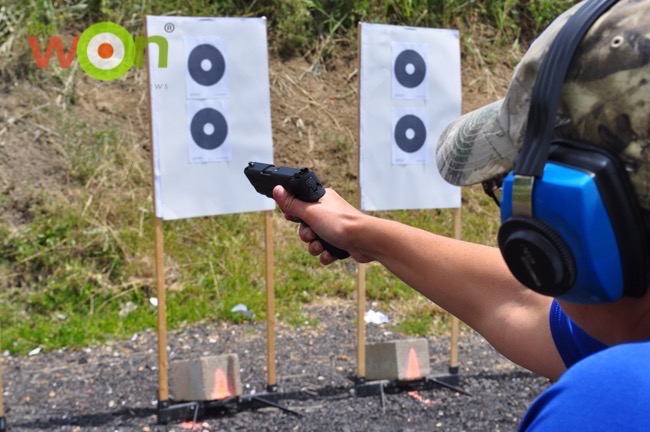
The biggest thing I learned from the course is that every district needs to have this training. This class far exceeded my expectations by putting the trainees in real-life scenarios and providing them with the training needed to handle those situations. As a U.S. Army veteran, I put this training right up there with my military instruction and consider it to be pivotal, life-changing and excellent.
Student 3:
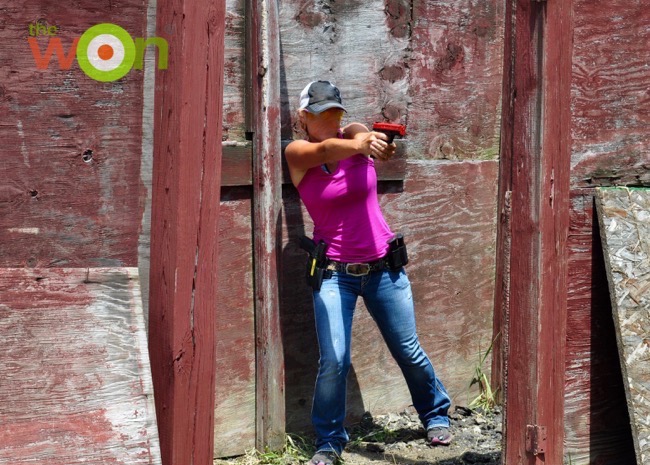
When I came I had no idea what to expect, but I will say I was very nervous. As an administrator at a school, my plan was that if I couldn’t handle it in training, I didn’t want to be the one to handle it when it’s the real thing. This class totally changed my thought process.
The training I received does not just apply to our school, but it applies to everyday life. I learned how to be alert and see things around me. I learned how to move swiftly and effectively through my school and how to handle the situation with a level head.
Carrying a firearm in school is not for everyone. This person must have the proper mindset and shooting ability. The purpose of having armed staff is not to replace police and EMT, but to allow on-site personnel to stop school violence rapidly and render medical aid immediately. It is a well-established fact that a faster response to school shootings and other violence results in fewer lives lost. How does your child’s school plan to respond to an active killer situation?
Michelle’s Mindset Reading List for FASTER Saves Lives
The Gift of Fear by Gavin De Becker
The Unthinkable: Who Survives When Disaster Strikes by Amanda Ripley
With Winning in Mind by Lanny Bassham
Left of Bang by Patrick Van Home and Jason A. Riley
Terror at Beslan by John Giduck
Inside the Mind of a Teen Killer by Phil Chalmers
This article about “FASTER Saves Lives” first appeared at Women’s Outdoor News July 21, 2016.
Canning Venison: The Pressure is On
Around the end of October a few years ago, while planning dinner, I searched through my somewhat disorganized freezer and found, buried in the bottom, a plastic bag of freezer-burned venison. Disgusted, I carried the icy block to the trash. Not only had all that delicious meat gone to waste, but it also took up precious space in my tiny freezer since last deer season.
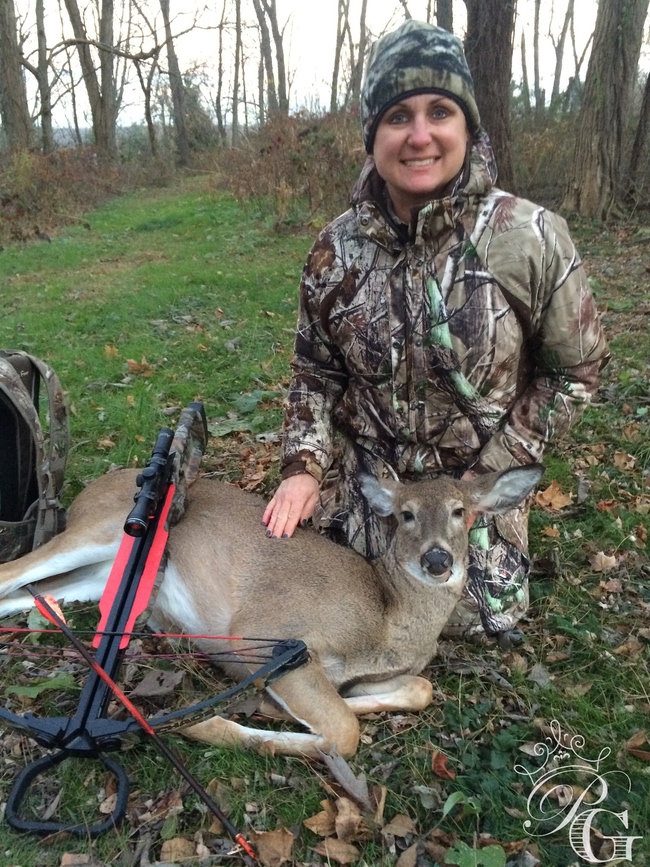
Luckily, I found a solution to the issue of failed venison storage of years past. A North Carolina friend of mine taught me the wonders of canning venison, using a pressure canner. The canning process was not a new thing to me. At a young age, I watched my mother and grandpa can tomatoes, peaches and apple sauce. Later, when I married and had a house and garden of my own, I carried on the tradition canning salsa and peppers every year using grandpa’s old Ball Blue Book of Canning with hot water baths. I never considered pressure canning. My mother always warned me of the horrors of pressure canners. “Grandma had a pressure canner blow up once in her kitchen. Food spewed everywhere. They are so dangerous,” she said. Against the wishes of my mother, I ordered a pressure canner and bought new jars, lids and bands. All I had to do was wait for the first harvest of the season.
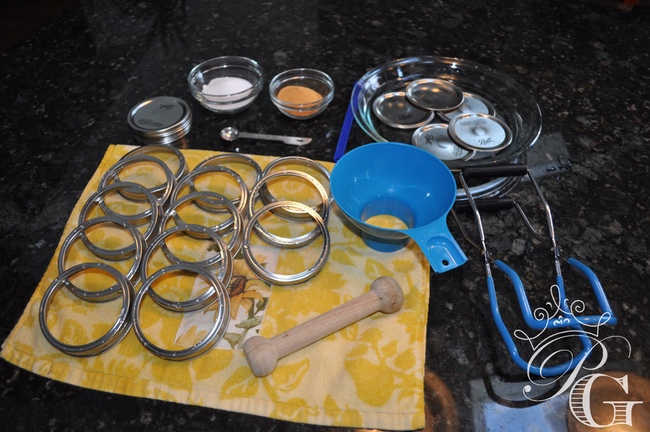
Pressure canning venison is truly an easy process so long as you diligently follow all the steps and don’t leave anything out. Read all of the instructions that came with your pressure canner before you begin. For those new to canning, you will also need to learn how to prepare the jars, bands and lids. I prepare my jars in the dishwasher, on the sterilize mode with nothing else inside. By keeping it closed until I am ready to use each jar, they remain hot, clean and out of the way. I place lids and bands in a bowl of hot water on the counter near my work area. Although mason jars and screw bands may be reused, I use new lids each time. Prepare the pressure canner by filling it with room temperature water up to the line noted in the manual and place it on a level cooking surface.
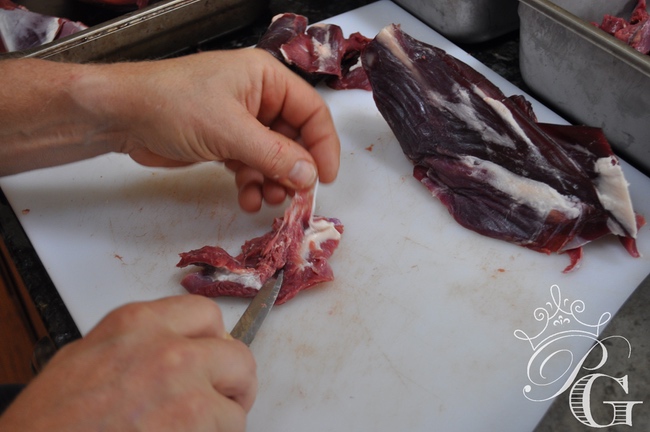
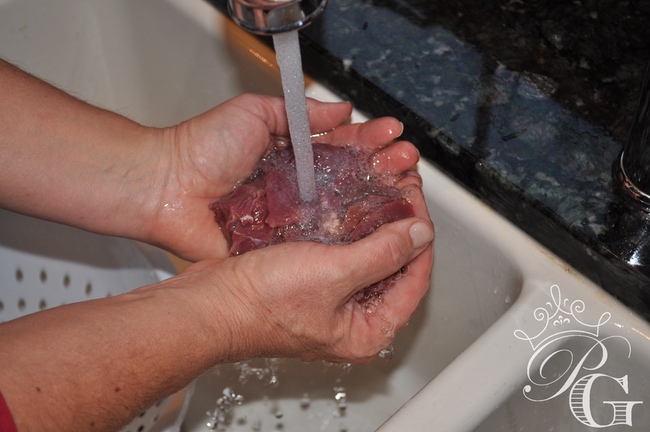
Preparation of the meat is the most labor intensive part. Trim away as much gristle, and fat as you desire from your raw, cool meat. Then, cut the meat into 1-inch cubes or strips. Once cut, rinse the meat in a strainer under cold water to remove any hair. Let it drain.
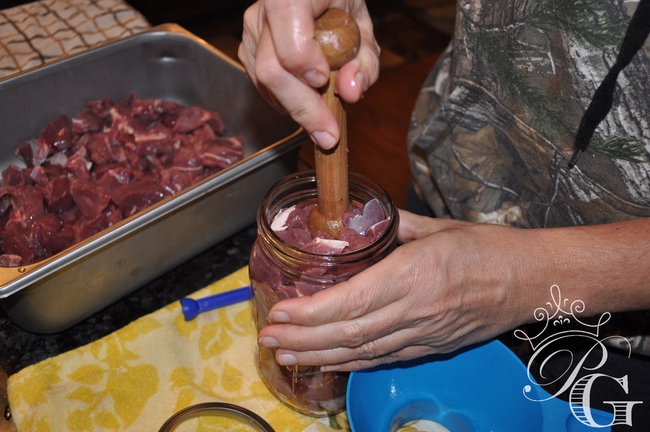
Now you can start filling the jars. Pack the prepared meat into those hot quart jars (remove them one at a time from your dishwasher) leaving a 1 inch headspace from the mouth. Occasionally you may notice a large empty pocket in the jar. Pack the meat down with the back of a wooden spoon or tart shaper to remove these excess air bubbles. Drop about 1/2 teaspoon of non iodized salt (to prevent clouding) and 1/2 teaspoon of Mrs. Dash (or any other seasoned salt) into the jar. DO NOT ADD ANY LIQUID.
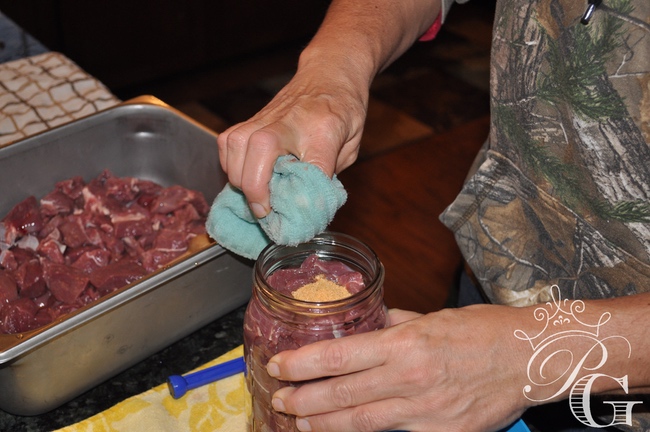
With the meat firmly packed inside, assemble the lid on the jar. Wipe around jar rim with a clean damp cloth, making sure there is no meat or grease that will interfere with a proper seal. Place a warmed lid on top and screw on the band, finger tight. Carefully place the jar inside a preheated pressure canner. Repeat this with the rest of your jars. Carefully make sure they don’t touch each other inside the canner.
Not to start the actual canning process. Follow the directions that came with your pressure canner and make sure not to miss a step.
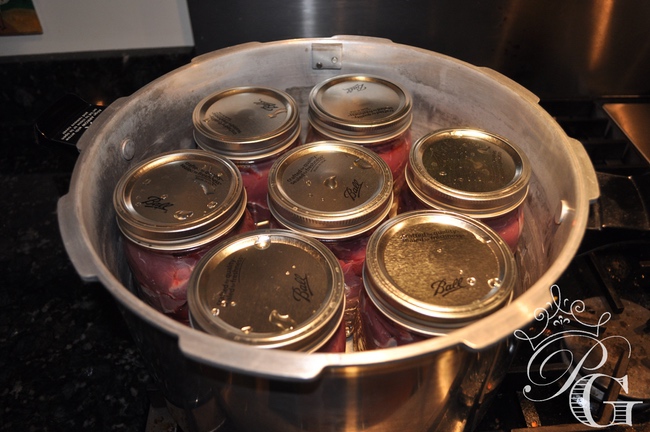
- Fasten the canner lid securely. Leave the pressure regulator off the vent pipe.
- Turn the heat setting on your stove to its highest position. Heat until the water boils and steam flows freely. While maintaining the high heat setting, let the steam vent continuously for 10 minutes.
- Put the pressure regulator on the vent pipe and wait for the canner to pressurize.
- Start timing the process when the pressure reading on the dial gauge indicates you’ve reached the recommended pressure.
- Regulate the heat under the canner to maintain a steady pressure at, or slightly above, the correct gauge pressure.
- It is extremely important to maintain a constant pressure with your canner. If the pressure starts to rise, lower the heat. Likewise, if it lowers, bring the heat back up. This is important for the safety of the food.
- When the timed process is complete, turn off the heat. Carefully lift the canner and remove it from the heat source. Let the canner cool down naturally.
- Once the pressure has returned to zero, remove the pressure regulator. Wait about 5 minutes, then carefully remove the lid.
- Remove the jars one at a time, using a jar lifter, being cautious not to tilt them. Carefully place them directly onto a towel, leaving at least one inch of space between the jars during cooling.
- Do not disturb the jars while they cool, for at least 12 hours (I leave them over night). You will hear a popping sound as they cool and seal. Do not tighten ring bands on the lids or push down on the lid until the jars have completely cooled.
- After they have cooled, remove bands from sealed jars. They can be used again and this prevents them from rusting.
- Wash jars to remove any residue.
- Label jars and store in a cool, dry place, out of direct light.
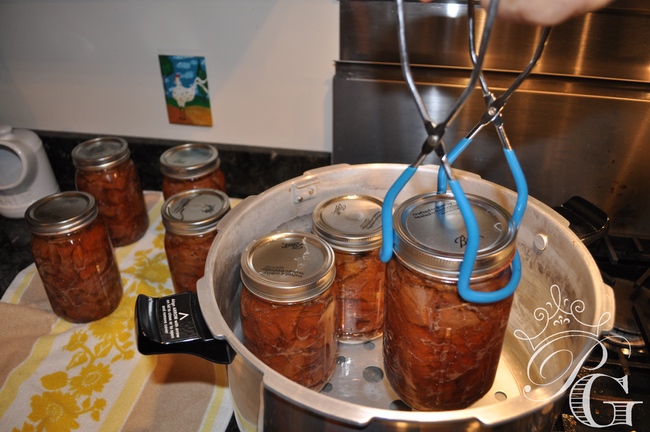
I process my jars at 11 pounds of pressure for 90 minutes in Ohio. Check the chart that comes with your pressure canner and process according to your altitude.

Voila! Now you have canned your venison. Rather than taking up space in the freezer, it can be stored on shelves in your pantry. When the meat is processed it mixes with the salt and seasoning and creates its own juices. Dinners will be as simple as opening one or two jars and heating it up.
Venison with Gravy
Ingredients: Canned venison, 2 tablespoons unsalted butter, 2 tablespoons flour.
Make a roux.
Melt 2 tablespoons of fat (I use unsalted butter).
Stir in 2 tablespoons of flour into the hot fat. Cook until browned.
While stirring slowly add the liquid from your jar. Bring to a simmer and continue stirring to avoid lumps.
Add your venison to the gravy. Heat until meat is warmed through. Sometimes I may add a little water if the gravy becomes too thick.
Serve over noodles, gnocchi or mashed potatoes.
My father-in-law always says that, “A recipe is only a guide for your imagination.” I am sure there are many other ways you can serve your canned venison. Hopefully someone in my family will tag a deer this year. I am looking forward to restocking my shelves and enjoying some easy to fix venison dinners. It’s a great feeling knowing that you won’t have to find room in the freezer to pack meat this year. Although I could probably throw out those sugary freezer pops that slid to the bottom.
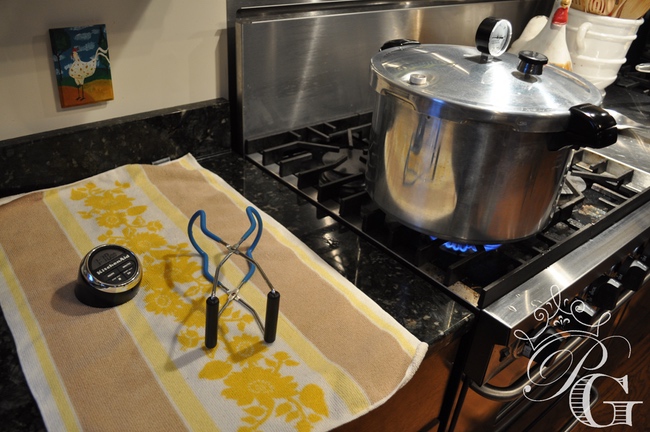
10 Steps to Ensure Safe Pressure Canning
- Read all the instructions that came with your pressure canner prior to getting started.
- Check dial gauges for accuracy before use each year and replace if they read high by more than 1-2 pound pressure. Gauges can be checked at most county Cooperative Extension offices.
- Clean canner lid gaskets and apply a light coat a vegetable oil once a year. Nicked or dried gaskets should be replaced.
- Make sure all vent pipes are clear and contain no trapped material or mineral deposits.
- Center the canner over the level burner.
- Always stay nearby when pressure canning to monitor the pressure gauge.
- Be sure to follow the recipe’s headspace instructions. Too little headspace can cause food to escape over the rim and cause the jar not to seal.
- Vent all types of pressure canners 10 minutes before pressurizing.
- At the end of processing time, allow the pressure to drop to zero naturally and wait two to five minutes before opening the lid.
- Do not set processed jars on a cold surface or expose to breezy conditions as they can crack.
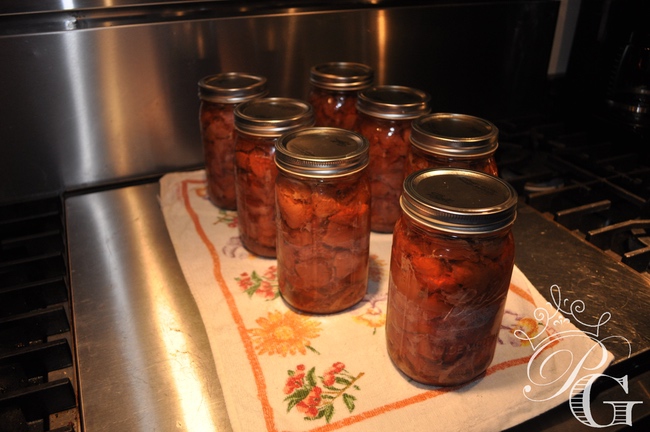
Try canning venison and save room in your freezer.
Have you ever smoked your venison? Check out my, “It’s Never too Late to Start Smoking … Meats that is.”
A Trip Through the Cuyahoga Valley National Park
Recently, I re-explored a lesser known national park that’s only 25 miles from my house. The Cuyahoga Valley National Park (CVNP) is the 11th most visited park, located on 33,000 acres between Cleveland and Akron, OH. It travels along 22 miles of the windy Cuyahoga River. Named from a blend of several Native American’s names Ka-ih-ogh-ha translates as “crooked river”. If you take a look at the map you’ll understand why.

Towpath Trail
My favorite way to travel through the CVNP is by bicycle. The entire length of the park includes the 22 mile Towpath Trail. This trail runs right over the original path that mules walked to tow canal boats floating down the Ohio & Erie Canal. Since the terrain is flat and made of paved crushed limestone it is easy riding and walking. Along the path are the remnants of the original locks from the long gone canal, three visitors centers, a wetland boardwalk and a bald eagle’s nest.
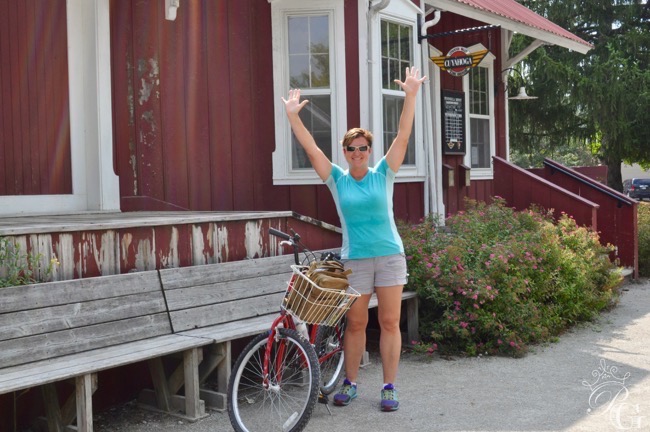
Bike Aboard!
If by chance you overextend your biking abilities (including the amount of time your rump can handle the bicycle seat) you an option. Take advantage of the Bike Aboard! program which runs May – October. From the boarding station along the towpath, just down a train by waving both your arms. For only $3 you and your bike enjoy an easy ride back to the car.
Scenic Railroad
Speaking of trains, the Cuyahoga Valley Scenic Railroad operates in conjunction with the CNVP. The education programs are my favorite. Whether learning about the animals of the park through the use of Native American story telling or the history of the Ohio & Erie Canal from the diary entries of a teenage canal worker, there is so much to learn. For those 21 and older, the Grape Escape & Ales on Rails are evening excursions that include an introduction to different wines or beer along with chef prepared hors d oeuvres. History buffs might enjoy a ride on the steam locomotive #765, one of the largest operating steam locomotives in the United States. The special events consists of dinners, breakfasts, murder mysteries and much more. Finally for the children, a Day Out with Thomas (the train) or a ride on The Polar Express are well loved adventures.
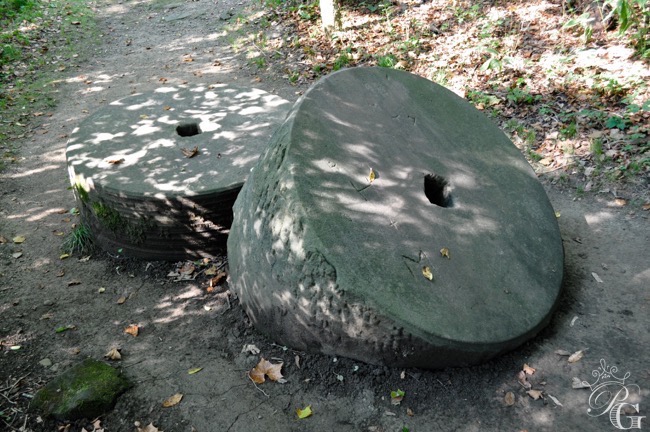
For those wanting a more vigorous walk, just veer off the towpath onto one of the 125 miles of trails. The numerous trails pass by many interesting locations. The most beautiful are the various waterfalls and colorful sandstone ledges. The historic bridges are the perfect places to walk in the creek beds and look for fossils. Although I haven’t fished there, the many ponds, lakes and river offer the perfect fishing spots with over 65 species.

Overnight stays are available in the park to visitors at the 5 primitive campsites, the Inn at Brandywine Falls or the Stanford House. There is also historic lodging, shops and restaurants just outside the park. I highly suggest if you want to get the most out of your trip to the CNVP plan on staying for a few days.
Winter Events
The CVNP has just as many winter outdoor activities as summer. There is downhill and cross-country skiing, ice fishing, snow tubing, sledding and even ice fishing. Year round it is an event filled national park to visit.
The National Park Service celebrated its centennial in 2016 with a major push encouraging more visitors. Did you get there? If so, make sure you return, if not, take the time to do your research and look for a park nearby. Don’t lose sight of what’s in your own backyard and visit a national park today.
Enjoy your next trip through the Cuyahoga Valley National Park!
8 Tips to Consider When Attending Firearms Training
Are you considering attending a firearms training course? These 8 tips may help you have a more successful class.
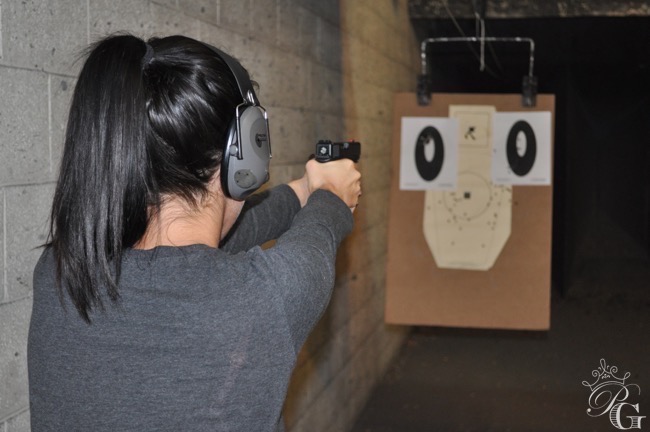
1. Attend firearms training with an open mind.
Listen to the instructors and follow the tactics and techniques they teach (unless it is unsafe). Even if it is a technique you may not agree with, why not try it? Take full advantage of everything being taught. See it, hear it and try it. When I attend someone’s training I listen intently to what they say. When the technique is then being demonstrated, I make sure to move myself to an area where I have a good view of the demonstration. Most importantly, I concentrate when I implement the technique myself, making sure I understand the process.
2. Know your firearm.
Although most instructors will help you, remember there are others in the class and you shouldn’t take up time trying to figure out your gun. This may mean reading your gun’s manual or perhaps watching some online videos ahead of time. Since I know how to disassemble my gun, I always make sure it is both clean and lubricated before I attend a class.
3. Bring all the equipment needed.
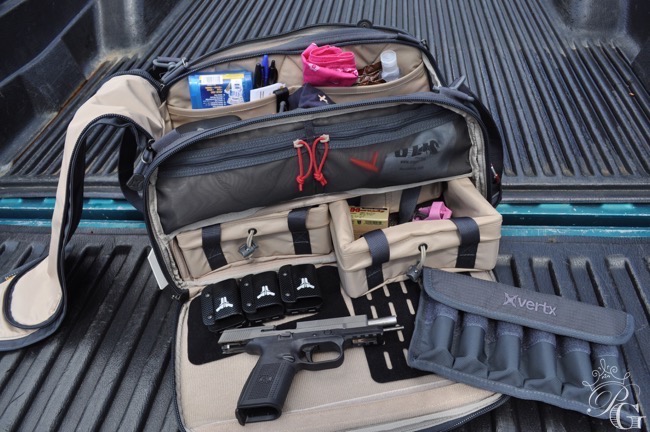
Did the instructor provide a list of the items needed? How much ammunition? Do you need a holster? Since I train both indoors and outdoors I wear ESS glasses with interchangeable lenses. That way I am ready for any lighting situation. I also bring both earplugs and electronic earmuffs. I can double up my hearing protect if necessary, or choose one or the other. When a holster is needed for a class, consider the type of training. Unless it is specifically a concealed carry class, I wear an outside-the-waistband drop holster, along with a double magazine pouch. Most importantly, I bring extra ammunition.
4. Wear the appropriate clothing.
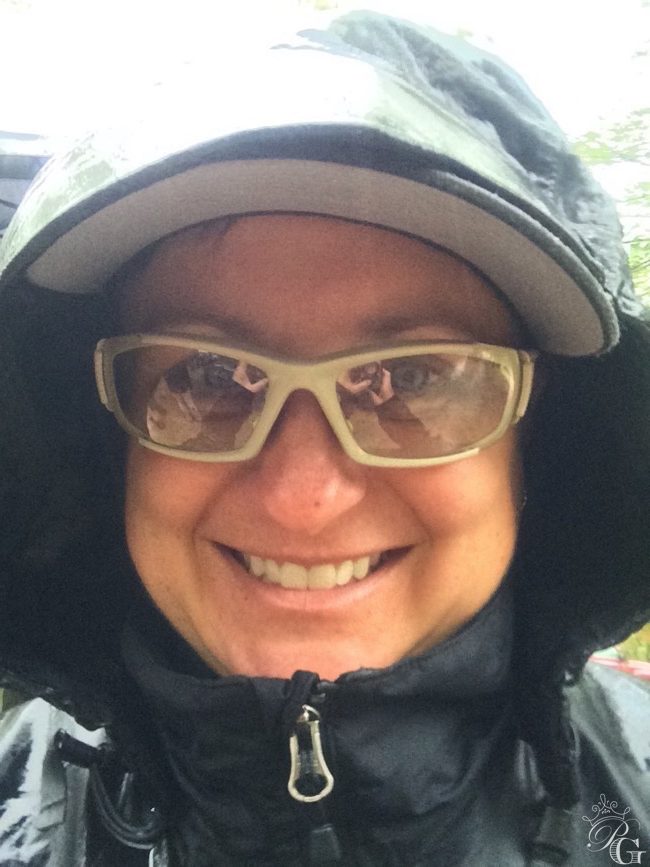
Are you training inside or outside? If outside, did you check the weather forecast? Will you be shooting paper or steel? Since I wear a holster that needs a belt when I train, I wear long pants with belt loops. The long pants also keep me from getting injured by any splash back, especially when shooting steel. Regardless of the elements a baseball hat is also a good idea. Not only does is keep brass from hitting my face, it also keeps both the sun and rain off my glasses. Speaking of rain, make sure to pack rain gear and layers if you are going to be outside. As well as the proper shoes for the surface you will be shooting on.
5. Pack a lunch, snacks and water.
Many times, depending on where the range is, you may need to travel far to buy a lunch. When I train, I bring a packed lunch with me. There are many times when the most valuable information from a training is learned during lunch time. It would be a shame to miss that because you have to make a trip to McDonalds. Staying hydrated and having snacks to keep your energy up is also important. There are many different types of snack bars, look for ones with a high amount of protein in them. And besides bringing just water, pack some mixes with electrolytes, especially on a hot day.
6. Ask questions.
If you don’t understand terminology, ask the instructor to explain it to you. Restate what you think he means in your own words to confirm you have the correct understanding. Remember, more than likely there is someone else in the class that has the same question, but is afraid to ask.
7. Don’t except everything you hear as gospel.
Although the principle points of instructors may be the same, you will certainly learn new tactics and some of his own techniques, that may be helpful. Try what you learn, see if it helps you improve, and go forward from there. You ultimately have to decide what works best for you.
8. Be on time.
Show up on time … actually arrive early. Find out how the instructor wants your gear organized. Usually class begins with an unloaded firearm and no ammunition in the classroom.
